Friday, January 29, 2010

White Chocolate Butterscotch Cookies

Print
IMG_2537 

I have been in a cookie mood lately. I just don’t think there is any thing wrong with wanting a freshly baked cookie to go with my lunch or after dinner snack and I blame my mother for that…she spoiled me rotten! This cookie sounded heavenly to me and I was quite surprised to see that butterscotch chips aren’t even listed as an ingredient. I was tempted to add some in, but then my curiosity got the best of me and I had to try it without first. The brown sugar really takes on the flavor of butterscotch and even though I could have added the butterscotch chips  to bring in even more flavor they were quite good without. I’m so happy to have cookies in my life!!

White Chocolate-Butterscotch Cookies   

Printer Friendly Version

1 3/4 cup all purpose flour

1/2 teaspoon baking soda

1/2 teaspoon salt

2 tablespoons unsalted butter, room temperature

3/4 cup vegetable shortening, room temperature

1 1/4 cups packed dark brown sugar

1 large egg

1 tablespoon pure vanilla extract

8 oz white chocolate, chopped into 1/4 inch pieces

Preheat oven to 350 degrees, with racks in the upper and lower thirds. Line two large baking sheets with parchment paper; set aside. In a medium bowl, whisk together the flour, baking soda, and salt; set aside.

In the bowl of an electric mixer fitted with the paddle attachment, beat the butter, shortening, and brown sugar on medium speed until light and fluffy, about 3 minutes, scraping down the sides of the bowl as needed. Beat in the egg and the vanilla until combined. With the mixer on low speed, add the flour mixture in two batches, beating  until just combined. Stir in the white chocolate.

Drop 2 tablespoons of dough at a time about 2 inches apart on prepared baking sheets. Bake, rotating sheets halfway through, until lightly golden brown around the edges, about 15 minutes. Let cookies cool on sheets for 2 minutes, then transfer parchment and cookies to a wire rack to cool completely.

Source: Martha Stewart’s Baking Handbook

Wednesday, January 27, 2010

Parmesan Roasted Asparagus

Print
IMG_2527

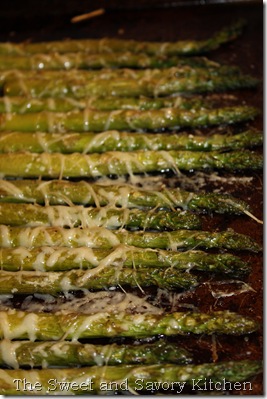
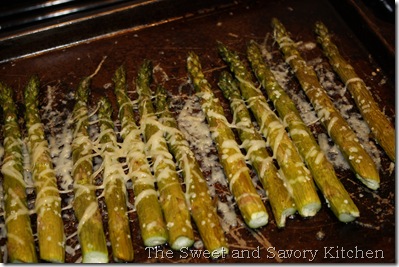
Fresh vegetables are still something that I’m learning how to use and cook with. As a child I refused to eat them, during the college years I forgot about them, lately though I seem to not be as ignorant to the fact that they are needed in my diet. This happens to be one of my favorite ways of eating asparagus. It is so simple, yet packed with flavor. This could also be a versatile way to cook many other vegetables.

IMG_2526

Parmesan Roasted Asparagus

Printer Friendly Version

2 1/2 pounds fresh asparagus (about 30 large)

2 tablespoons olive oil

1/2 teaspoon kosher salt

1/4 teaspoon freshly ground black pepper

1/2 cup freshly grated Parmesan cheese

2 lemon cut in wedges, for serving

Preheat oven to 400 degrees.

If the stalks of the asparagus are thick, peel the bottom half of each. Lay them in a single layer on a sheet pan and drizzle with olive oil. Sprinkle with salt and pepper. Roast for 15 to 20 minutes, until tender. Sprinkle with Parmesan and return to the oven for another minute. Serve with lemon wedges.

Source: Barefoot Contessa Family Style by Ina Garten

Tuesday, January 26, 2010

Pork Chops with Garlic and Herbs

Print
IMG_2530

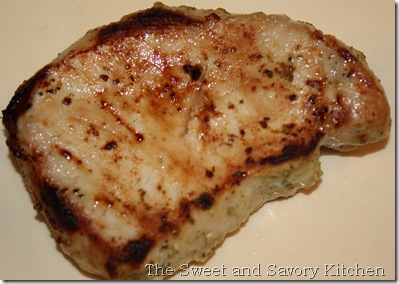
I don’t know if you’ve noticed, but anytime I make a pork dish, it is usually from a pork tenderloin. I don’t have anything against pork chops, but for some reason most of the recipes I’ve tried with chops just don’t come out that great. Usually the meat is dried out or the flavors are just bland. I haven’t given up on trying new pork chop recipes, but they seem to be few and far between…this is one that turned out really well. I decided to forego the grill and just cooked the pork under the broiler which worked out really nicely. So what is so special about this boring looking piece of meat?!? The marinade really soaked into the meat and the hidden garlic slivers roasted inside gave it an extra punch of flavor.

Pork Chops with Garlic and Herbs

Printer Friendly Version

4 bone-in pork rib chops (I used boneless)

4 garlic cloves, 2 cut into slivers and 2 chopped

2/3 cup dry white wine

2 tablespoons olive oil

1/2 teaspoon sugar

1/2 teaspoon salt, plus more to taste

1/2 teaspoon freshly ground pepper, plus more to taste

2 tablespoons fresh sage, chopped

2 tablespoons fresh rosemary, chopped

Working with 1 pork chop at at time and using a sharp knife, cut small slits on both sides of the chop and insert a garlic sliver into each slit. Arrange in a single layer in a nonreactive dish.

In a food processor, combine the wine, olive oil, sugar, salt and pepper and process to blend. With the motor running, drop the chopped garlic, sage, and rosemary through the feed tube and process until fairly smooth. Pour the wine mixture over the chops, cover and marinate at room temperature, turning at least once, for 30 minutes to 1 hour.

Preheat broiler or grill to medium heat.

Remove the pork chops from the marinade. Season the chops with salt and pepper and arrange on the broiler pan or on the grill. Broil or grill, turning once, 4 to 5 minutes per side for medium, or until done to your liking.
Transfer the chops to a warmed platter and serve immediately.

Source: Williams-Sonoma

Monday, January 25, 2010

Lemon Poppy Seed Muffins

Print
IMG_2514

I am officially the proud owner of Baking from My Home to Yours by Dorie Greenspan. After 3 check outs from the library I finally decided to ask for the book for Christmas and my brother and SIL surprised me with a copy!!  I absolutely love this book and have made several of the recipes, all of which were fantastic. Last week I was craving something tart and thought this muffin would fill the need. Secretly I think I wanted to be transported to summer, with a slice of of key lime pie, sitting on the beach somewhere, cooling down and relaxing, but the muffin was all good despite the cold January weather.  Honestly I have had lots of poppy seed muffins before, but I don’t know that they have ever included an icing on top, but the addition was a nice compliment to the muffin itself. The lemon provides the muffin with its distinct flavor and makes it all together yummy!! Happy Monday everyone.

Lemon Poppy Seed Muffins

Printer Friendly Version

2/3 cup sugar

Grated zest and juice of 1 lemon

2 cups all purpose flour

2 teaspoons baking powder

1/4 teaspoon baking soda

1/4 teaspoon salt

3/4 cup sour cream

2 large eggs

1 teaspoon vanilla extract

1 stick unsalted butter, melted and cooled

2 tablespoons poppy seeds


For the Icing:

1 cup confectioners’ sugar

2 to 3 tablespoons fresh lemon juice

Preheat oven to 400 degrees. Butter of spray a 12 mold muffin tray or place paper muffin cups inside mold.
In a large bowl, rub the sugar and lemon zest together with your fingertips until the sugar is moist and the fragrance of lemon is strong. Whisk in the flour, baking powder, baking soda, and salt. In a large glass measuring cup or another bowl, whisk the sour cream, eggs, vanilla, lemon juice, and melted butter together until well blended. Pour the liquid ingredients over the dry ingredients and, with the whisk or rubber spatula, gently stir to blend. Stir in the poppy seeds. Divide the batter evenly among the muffin cups.

Bake 18 to 20 minutes, or until the tops are golden and a toothpick inserted into center of the muffins comes out clean. Transfer the pan to a rack and cool for 5 minutes before carefully removing each muffin from its mold. Cool on wire rack completely before icing.


To Make the Icing: Put the confectioners’ sugar in a small bowl and add about 1 1/2 tablespoons of the lemon juice. Stir with a spoon to moisten the sugar, then add enough additional juice, a dribble at a time, to get an icing that is thin enough to drizzle from the tip of a spoon. You can drizzle lines of icing of the tops of the muffins or coat the tops entirely.

Source: Baking from My Home to Yours by Dorie Greenspan, 2006

Friday, January 22, 2010

Basmati Rice

Print
IMG_2456

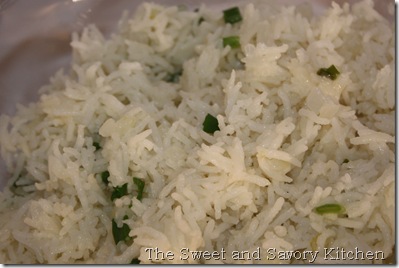
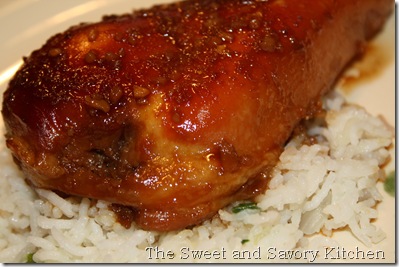
I have never used basmati rice before and didn't really know what it was until now. It is native to India and Pakistan and carries a fragrant scent when cooking. Many Indian restaurants serve this type of rice with their meals. The method for cooking the rice reminded me a lot of the rice pilaf I have made before and it was just as good. I made the rice to go with the Indonesian Ginger Chicken I posted about yesterday and when mixed with the sauce from the chicken it is quite delicious!

Basmati Rice

Printer Friendly Version

1 tablespoon unsalted butter or olive oil

1 yellow onion, diced

1 cup long grain basmati rice

1 3/4 cups water

1 1/2 teaspoon kosher salt

1/4 cup sliced scallions

1 tablespoon minced fresh parsley

Cook the butter and onions over medium heat until translucent, about 3 minutes. Add the rice and toss until all of the grains are coated with the butter. Add the water and salt, cover and cook until the water is absorbed and the rice is tender, about 15 to 20 minutes.

Turn off the heat and allow to sit covered 5 to 10 minutes. Add the scallions and parsley, fluff with a fork, and serve.

Source: www.foodnetwork.com/The Barefoot Contessa

Thursday, January 21, 2010

Indonesian Ginger Chicken

Print
IMG_2464

I was really nervous about this recipe. All the ingredients are things I love, the recipe received great reviews, but there are always a couple of bad reviews that make you question if it is worth trying. I am happy to report that I loved this recipe. I will say that I feel like the amount of chicken the recipe calls for feeds more than 4 to 6 servings, so I only used about 3 1/2 pounds and I used boneless chicken breasts instead of the whole chicken. I probably could have cut down the sauce recipe as well, and I was really tempted to....1/2 cup of ginger is a lot, but I decided to go with it and even though it was a lot, the chicken marinated really well, there was great flavor, and plenty of sauce to drizzle on top. This is another recipe for anyone that loves ginger!

Indonesian Ginger Chicken

Printer Friendly Version

1 cup honey

3/4 cup soy sauce

1/4 cup garlic, minced

1/2 cup peeled and grated fresh ginger

3 1/2 pounds boneless chicken breast

Cook the honey, soy sauce, garlic, and ginger in a small saucepan over low heat until the honey is melted. Arrange chicken in a shallow baking pan, skin side down in one layer. Pour sauce over the chicken. Cover pan tightly with aluminum foil. Marinate overnight in the refrigerator. (I marinated the morning of, but only because I didn’t read the recipe before hand!)

Preheat the oven to 350 degrees.

Place the baking pan in the oven and bake for 30 minutes. Uncover the pan, turn the chicken skin side up, and raise the temperature to 375 degrees. Continue baking for 30 minutes or until the juices of the chicken run clear and the sauce is a rich, dark brown.

Source adapted from: www.foodnetwork.com/The Barefoot Contessa

Wednesday, January 20, 2010

Black and Tan Cookies

Print
IMG_2475

I have discussed certain food items before that seem to be popular here on the east coast that I had never heard of until moving here. In just about every diner or bakery you walk into, you are almost guaranteed to find black and white cookies. I've sampled this cookie from multiple places and I still can't figure out what the big deal is about this cookie. It looks really appealing to the eye, but that is as far as it goes for me, so I was happy to see Daydream desserts recipe for a more improved variation of the black and white cookie, the black and tan cookie. This cookie carries hints of the espresso without being too overpowering. The chocolate side is rich, and well, chocolaty while the tan side reminded me more of a caramel flavor. The icing provides a nice crunch as you bite into the soft cookie. Now I feel like I am almost participating in the black and white cookie craze, only this cookie is so much better!

Espresso Black and Tan Cookies

Printer Friendly Version

1 cup cake flour

1 cup all-purpose flour

1 teaspoon baking powder

1 1/2 sticks unsalted butter, softened

1 cup sugar

1 large egg, room temperature

1/2 teaspoon vanilla extract

1 1/2 teaspoon instant espresso powder

1/2 cup buttermilk

Preheat oven to 350 degrees. Place racks in the lowest portion of the oven. Line two baking sheets with parchment paper.

Whisk together cake flour, all-purpose flour, and baking powder. Set aside. Dissolve the espresso powder in the buttermilk.

Cream the butter and sugar with an electric mixer until fluffy, about 2 minutes. Add the egg and vanilla, mix at medium speed until incorporated.

With the mixer on low, add flour mixture in two or three additions, alternating with the buttermilk mixture. Beat until ingredients are incorporated.

Spoon the batter onto the parchment paper by the tablespoon ensuring you leave enough space between each cookie. Bake for 8 minutes, then turn the pan and bake for another 4 to 6 minutes until the cookies are golden around the edges. Cool on wire rack.


Espresso and Chocolate Icing

2 1/2 cups plus 1 teaspoon confectioners’ sugar, plus more as needed

1 tablespoon light corn syrup

2 teaspoons espresso powder, dissolved in 2 tablespoons hot water

1/4 teaspoon vanilla extract


Chocolate Icing

1 ounce bittersweet chocolate, finely chopped

2 tablespoons unsweetened cocoa powder

1/2 teaspoon espresso powder, dissolved in 1 1/2 tablespoons hot water

1 teaspoon light corn syrup

In a small bowl, combine the confectioners’ sugar, corn syrup, dissolved espresso powder, vanilla, and stir until smooth. Divide in half between two bowls.

Melt the chocolate in a microwave safe bowl at 50% power for 2 to 3 minutes. Stir until smooth, then pour melted chocolate into one of the bowls along with the cocoa powder, dissolved espresso, and corn syrup.
With an offset spatula coat half of each cookie with chocolate icing and allow to set. Coat the other side with the espresso icing and allow to set. If either icing seems too runny, add a teaspoon of confectioners’ sugar at a time until consistency is just right. If chocolate icing starts to set, microwave for 10 to 15 seconds at 50% power.

Source: Daydream Desserts, originally adapted from Desserts by the Yard

Monday, January 18, 2010

Brazilian Shrimp Soup

Print
IMG_2443

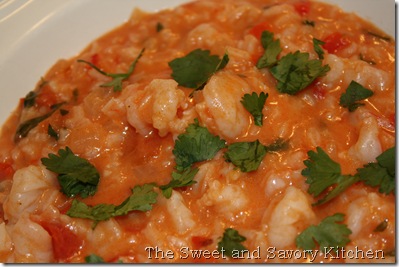
Sometimes you run into recipes that are so simple, yet so good they make you want to cry...and this is one of them! I don't know why I hadn't tried this sooner, but I am so glad we have met because I will be making it again and again. This dish was a cross between almost a jambalaya and a stew. I will admit that I moved on to other things while the soup was simmering and I lost some of the juices, which would have made it more soupy, but it was still so good. It had hints of spice with the red pepper flakes and sweetness from the coconut milk. I'm also a sucker for anything with cilantro added to it so I was super happy to have it with my shrimp. This dish even made my husband's top 5 list of dishes he loves the most...it is definitely a keeper! For those that might not love shrimp, substitute boneless, skinless chicken breasts cut into strips instead.

Brazilian Shrimp Soup

Printer Friendly Version

2 tablespoons olive oil

1 yellow onion, chopped

1 red bell pepper, chopped

3 cloves garlic, minced

3/4 cup long grain rice

1/2 teaspoon red pepper flakes

1 3/4 teaspoon salt

1 3/4 cups canned crushed tomatoes

5 cups water

1 cup canned unsweetened coconut milk

1 1/2 pounds medium shrimp, peeled and cut in half horizontally

1/4 teaspoon black pepper

1 tablespoon freshly squeezed lemon juice

1/2 cup cilantro, chopped

Heat the olive oil in a large stockpot or Dutch oven over medium high heat. Add the onion, bell pepper, and garlic and cook until the vegetables are tender, about 7 minutes.

Add rice, red pepper flakes, salt, tomatoes, and water to the pot. Bring to a boil, reduce the heat to a simmer and cook, covered, for 10 minutes or until the rice is almost tender. Stir in the coconut milk. Return to a simmer, then stir in the shrimp. Simmer just until the shrimp are cooked through, about 3 to 5 minutes. Stir in the pepper, lemon juice, and cilantro.

Serve immediately.

Source: Annie’s Eats, originally from Food and Wine

Friday, January 15, 2010

Banana Bread Sandwiches

Print
IMG_2318

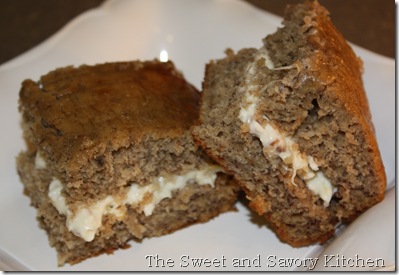
The first time I tried this sandwich was for my sister-in-law, Beth's wedding shower that my mother-in-law and I threw for her. They were really good and I knew they would make a good finger food to bring for my office's "Food day" at work. I'm not quite sure what classification this sandwich falls into. For some, it is sweet enough to be a dessert. I tend to lean more toward a finger food good for breakfast or a quick snack. Banana bread is one of my favorite breads and I would have never thought to pair it with coconut or pineapple, but the combination is delicious together.

Banana Bread Sandwiches

Printer Friendly Version

2 cups all purpose flour

1 cup sugar

1 1/2 teaspoons baking soda

1 teaspoon ground cinnamon

3/4 teaspoon salt

1/4 teaspoon ground nutmeg

3/4 cup vegetable oil

3 large eggs

2 1/2 cups mashed ripe bananas (about 6 medium)

1 teaspoon vanilla extract

Preheat oven to 350 degrees. Spray a 13 x 9 inch baking pan with nonstick baking spray with flour.

In a large bowl, combine flour, sugar, baking soda, cinnamon, salt, and nutmeg.

In a medium bowl, combine oil, eggs, bananas, and vanilla. Add to flour mixture, beating at low speed with an electric mixer until combined.

Pour into prepared pan and bake for 23 to 27 minutes, or until a wooden pick inserted in center comes out clean. Let cool in pan for 30 minutes. Remove from pan, and cool completely on a wire rack.

Cut cake into 3 x 1 inch slices. Cut each slice in half crosswise. Spread Pineapple-Coconut Filling (recipe below) evenly over bottom halves of banana bread. Cover with top halves of bread.

Pineapple-Coconut Filling

1 (8 oz) package cream cheese, softened

1/2 cup pineapple preserves

1/4 cup sweetened flaked coconut

1/4 cup finely chopped pecans

In a small bowl, beat cream cheese and preserves at medium speed with an electric mixer until combined. Stir
in coconut and pecans. Cover, and chill.

Source: Cooking with Paula Deen magazine, May/June 2009

Thursday, January 14, 2010

Yummy Potatoes

Print
IMG_2067

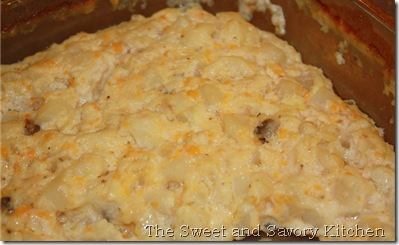
This is another childhood recipe I grew up on and still love today, and they are in fact very yummy! I find great joy in a dish that is as simple as tossing ingredients together and baking. The sour cream and cream of mushroom soup add a lot of flavor and creaminess to the dish.  This can easily be made the night before for an easy prep. The recipe calls for frozen hash browns, which is another plus…no need to chop up potatoes, just be sure to drain your potatoes after thawing, otherwise you will have very runny potatoes that aren’t so yummy! I actually made this for a party we went to before the holidays, so it does make a lot. For a family of four, I would suggest halving the recipe, unless you have potato lovers in your family, and it that case the leftovers are good too!

Yummy Potatoes

Printer Friendly Version

2 lb package cubed hash browns, thawed

1/2 cup (1 stick) melted butter

1/2 cup chopped onion

1 can cream of mushroom soup

1 cup milk

1 cup sour cream

1 1/2 cups grated cheddar cheese

Preheat oven to 350 degrees.

Grease or spray a 9 x 13 pan with cooking spray.

Place hash browns in prepared pan, making sure that all water has been drained out.

In a medium bowl combine melted butter, onion, soup, milk, sour cream, and 1 cup grated cheese. Once combined, pour over the top of has browns. Sprinkle with remaining 1/2 cup cheese.

Bake for 1 hour.

Wednesday, January 13, 2010

Island Pork Tenderloin

Print
IMG_2030

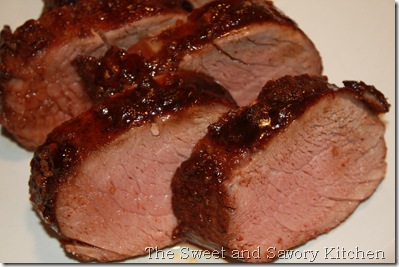
The name of this dish alone makes me think of warm, tropical places; even though I am no where near a palm tree this dish is yet another great pork tenderloin recipe. I seem to favor the recipes that start with a spice rub on the pork which gives it such good flavor. This rub and sauce combo has a spicy/sweet element that goes great together. For anyone that might be turned off by the cinnamon in the spice rub you must try, it is very subtle and works well with the other spices.

Island Pork Tenderloin

Printer Friendly Version


For the spice rub:

2 teaspoons salt

1/2 teaspoon freshly ground black pepper

1 teaspoon cumin

1 teaspoon chili powder

1 teaspoon cinnamon

2 pork tenderloins (around 2.5 pounds total)

2 tablespoons olive oil


For the glaze:

1 cup dark brown sugar, packed

2 tablespoons minced garlic

1 tablespoon Tabasco

In a small bowl, combine the salt, pepper, cumin, chili powder, and cinnamon. Place spice rub all over pork until fully coated.

Place oil in an oven proof skillet over medium-high to high heat just until it begins to smoke. Brown pork, turning occasionally, about 4 minutes total. Remove from heat.

In a small bowl, stir together the brown sugar, garlic, and Tabasco. Pat the mixture on the tops of the tenderloins.

Place skillet in the oven at 350 degrees. Roast until thermometer inserted diagonally into the center of the meat registers 140 degrees, about 20 to 30 minutes. Let pork stand, loosely covered with foil for 10 minutes. Cut into slices before serving.

Source: Things That Make You Go Mmmmmm, originally from The Gourmet Cookbook

Tuesday, January 12, 2010

Cinnamon Rolls

Print
IMG_2350 (1)

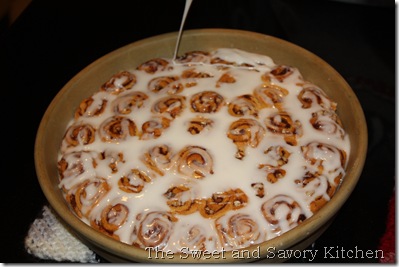
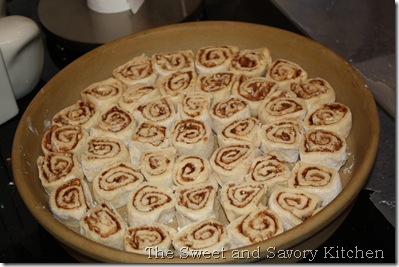
This recipe is very near and dear to my heart. Each time I go home to visit my folks, my mom always knows to make me these cinnamon rolls. Some things are always better with the places and people nearest to you, but I think you will learn to love this quick and easy recipe as much as I do. My mom doesn't really have measurements for this, so I made sure to take lots of pictures of the process and I made guesses as to the amount of each ingredient used.  

Mom’s Cinnamon Rolls

2 cans of Pillsbury un-perforated crescent rolls

About 4 to 6 tablespoons softened butter

About 4 to 6 tablespoons sugar

About 4 to 6 teaspoons cinnamon

About 4 to 6 tablespoons of pecans (if desired)

Lightly flour working surface. Unroll one can of crescent rolls to working surface.

IMG_2340

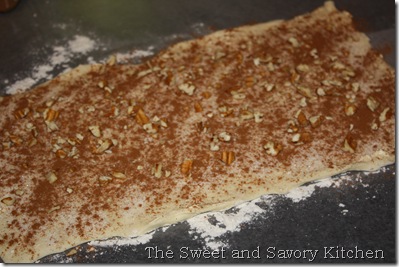
Spread about 2 to 3 tablespoons of butter to cover top of roll, repeat process with 2 to 3 tablespoons sugar, 2 to 3 teaspoons cinnamon, and 2 to 3 tablespoons pecans, as shown above.

IMG_2342

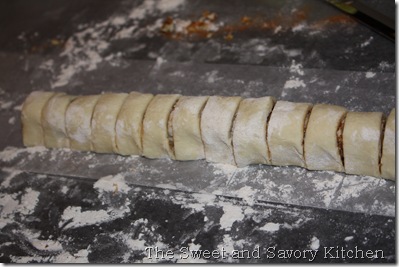
Begin to roll dough lengthwise, placing seem side down. Slice into 1 inch rolls, making around 19 rolls per sheet. Repeat steps with second roll of crescent dough.

IMG_2344

Place rolls in a round baking dish. Bake at 350 degrees for 23 to 25 minutes, or until golden brown. Let rolls sit for 5 to 10 minutes to cool. In the meantime, making icing.

Icing

2 cups powdered sugar

2 to 3 tablespoons milk

Combine powdered sugar and milk until desired consistency.

IMG_2349

Spread icing all over rolls. Serve immediately.

Friday, January 8, 2010

Status of Site

Print
I did a really stupid thing yesterday. I deleted the file that was backing up all my pictures to the site. Currently no pictures are viewable. I do still have the pictures on my hard drive, so please bare with me for a few more days as I reload the pics. I guess this is what still makes me an amateur...I'm still learning what not to do. Have a good weekend everyone.

And because I can't resist....ROLL TIDE ROLL, GO BAMA!!!

Thursday, January 7, 2010

Penne a la Betsy

Print
IMG_2266
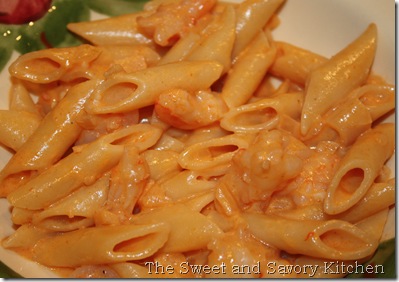
I haven't really said much about all the Christmas gifts I got over the holidays. A lot of the things on my wish list were for the kitchen and I am super excited to start using all my new gadgets, dishes, and cookbooks. My sister-in-law Melinda got to go to one of Pioneer Woman's book signings (so jealous) and picked up a copy of her book as my Christmas present! This is one  recipe featured in the book. There have been many in the blog world that have made this dish and I haven't found a single person that didn't enjoy it. It reminded me of a Penne Vodka sauce, only it seems much lighter. I'm always happy to have shrimp accompany my pasta so overall it was a delicious meal that I can't wait to make again!

Penne a la Betsy

Printer Friendly Version

3/4 pounds Penne pasta

1 pound shrimp

3 tablespoons butter

3 tablespoons olive oil

1 small onion

2 cloves garlic

1/2 cup white wine

1 can (8 oz) tomato sauce

1 cup heavy cream

Fresh parsley, to taste

Fresh basil, to taste

Salt and pepper, to taste

Cook the pasta according to package directions until tender and firm.

Peel,devein, and rinse the shrimp. Heat about 1 tablespoon butter and olive oil in a skillet. Add the shrimp and cook for a couple minutes until just opaque. Do not overcook. Remove from heat and let cool for a few minutes. Place on a cutting board, pull off tails, and chop into bite size pieces. Set aside.

Finely dice onion. Mince two cloves of garlic.

In a large skillet heat 2 tablespoons of butter and 2 tablespoons olive oil. Add the garlic and onion and sauté, stirring occasionally. After the garlic and onions have cooked a bit add in the white wine. Let the wine evaporate for a few minutes, stirring occasionally. If you would rather not use wine, you can substitute low-sodium chicken broth instead (about 1/2 cup).

Add in the tomato sauce. Stir until combined. Add 1 cup of heavy cream. Continue stirring. Turn heat down to low and let simmer. Add in the shrimp. Add salt and pepper to taste as well as the herbs and stir until combined. Finally add your cooked pasta and stir to combine.

Source: The Pioneer Woman.com

Wednesday, January 6, 2010

Bananas Foster

Print
IMG_1437

Sometimes my mother-in-law likes to play with fire.

On occasion she likes to set alcohol on fire.

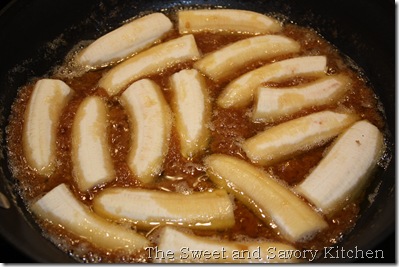
She claims it's all for us and serves us a nice bowl of caramelized bananas, but I think its all just front and we're really just encouraging her habits, but in the end who can resist a dessert like Bananas Foster?

IMG_1441

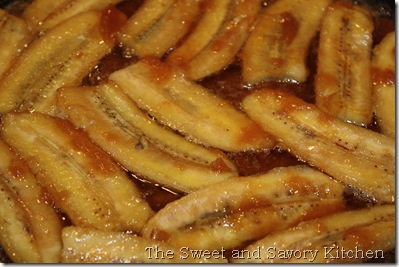
Obviously, my mother-in-law is not suffering from any kind of illness,but she has been known to make Bananas Foster for us. I personally just like to watch because I'm mildly afraid of setting my hair or house on fire. For those that have more courage than me, this really is a quick and easy dessert. My favorite way to eat it is with a slice of pound cake, a scoop of vanilla ice cream, a heaping pile of bananas, a generous drizzle of the rum sauce, and a dollop of whip cream on top. It is seriously good.

Bananas Foster

Printer Friendly Version

1 stick butter

1/2 cup brown sugar

4 bananas peeled, halved, and cut lengthwise

1/4 cup dark rum

Ice cream, optional

Pound cake, optional

In a large skillet, melt butter. Using a wooden spoon, add brown sugar and stir together. Add the bananas and cook until caramelized on both sides, over medium-high heat. Move pan off heat, add the rum and return to the stove to catch a flame from the gas stove or a long lighter. Stand back when ignited and flambé the bananas. PLEASE be careful as the flame will shoot up above the pan. Let flame die down and the alcohol cook out. Serve bananas over vanilla ice cream and with a slice of pound cake, if desired.

Source: www.foodnetwork.com/Paula Deen, 2007

Tuesday, January 5, 2010

Chicken and Mushroom Pockets

Print
IMG_2086

I have been waiting for the right occasion to try this recipe. On many weekends around our place, we snack around all day instead of cooking meals, especially during college football season. Since I now have class on Saturdays I haven't been able to indulge in our typical spread of food. A couple weeks ago I decided to make a snack and thought these would be the perfect little bite. Typically, I don't enjoy mushroom in things, but my Big Girl taste buds can now handle them, plus you can almost guarantee that I will like anything wrapped up in a croissant or other buttery roll and this recipe was no exception. The pocket is filled with the perfect amount of seasoning to compliment the chicken and mushrooms and every bite has the creaminess from the cream cheese mixture. Football season may be drawing to a close, but I will definitely be making these again.

Chicken and Mushroom Pockets

Printer Friendly Version

2 tablespoons butter

1 (8oz) package sliced fresh mushrooms

1/2 cup minced green onion

2 cloves garlic, minced

1 1/2 cups finely chopped cooked chicken

1 (8oz) package cream cheese, softened

1 (5oz) package shredded Parmesan cheese

1/2 teaspoon ground black pepper

3 (8oz) cans un-perforated crescent roll dough

In a large skillet, melt butter oven medium heat. Add mushrooms, onion, and garlic; cook for 6 to 7 minutes, or until mushrooms are tender. Reduce heat to low; add chicken and cream cheese, stirring until cream cheese is melted and smooth. Remove from heat, and stir in cheese and pepper. Let mixture cool for 20 minutes.

Preheat oven to 375. Line baking sheets with parchment paper.

On a clean flat surface, unroll 1 can dough. Cut dough lengthwise into 3 equal parts; cut dough crosswise into 5 equal parts, making 15 squares. Spoon about 1 tablespoons filling onto center of each square. Pull up corners of dough over filling, pressing dough together gently to seal. Repeat procedure with remaining dough and filling. Place of prepared baking sheets. Bake for 10 to 12 minutes, or until golden brown. Serve immediately.

Note: Be sure to use un-perforated crescent roll dough.

Source adapted from: Cooking with Paula Deen, May/June 2009

Friday, January 1, 2010

The Best of 09!

Print
I can’t quite believe that today is the start of a brand new year. 2009 was a good year in many ways and a year of many first for me. I am happy that I finally started blogging about the many dishes that I try. I love that I can channel my passion and let so many others be a part of the experience. Hopefully 2010 will be another year of learning in the kitchen and in life. I am praying that I can balance both my MBA studies and all my hobbies, otherwise I might go insane. Even though I starting blogging halfway thru the year, I wanted to recap some of my favorites from 2009.
September
Banana’s and Cream Cake
IMG_1341
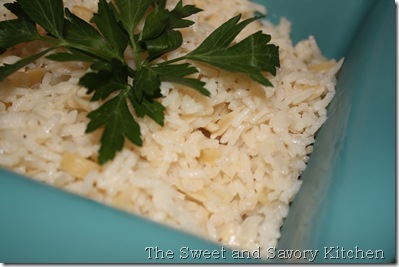
Almond Rice Pilaf
IMG_1365
October
Maui Zaui Pizza
IMG_1230 
Chewy Chocolate-White Chocolate Chunk Cookies
IMG_1262
November
Chicken Tortilla Soup
IMG_1865
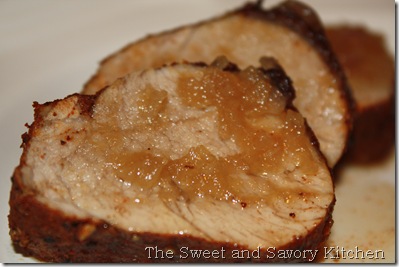
Spicy Pork Tenderloin with a Ginger-Maple Sauce
IMG_1305
December
Ginger Snap Cookies
IMG_1950
Breakfast Empanadas
IMG_2123

I wish everyone the best in 2010!

HAPPY NEW YEAR!!!