Friday, July 30, 2010

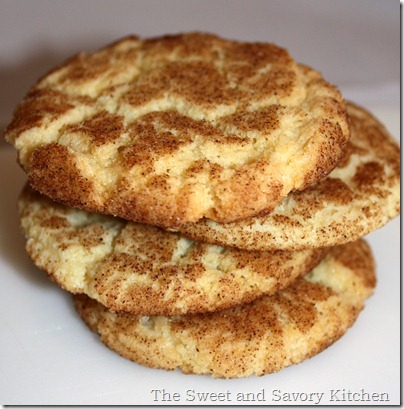
Snickerdoodle Cookies

Print

IMG_3957

It's Friday once again and July is almost over... can you believe it? I feel like I haven’t taken enough advantage of the summer yet and it is almost over. This is another recipe from my mom, filled with lots of childhood memories. Snickerdoodles are best known for their unique ingredient, cream of tartar. The cookie is similar to a sugar cookie, rolled in cinnamon and sugar before baking. My mom always let me roll the dough in the cinnamon and sugar mixture, which was always my favorite part! Some prefer a snickerdoodle that is baked until crispy. My preference is a soft, chewier snickerdoodle. Try it both ways and decide your preference, either way it is still a favorite cookie of mine. If you already have a snickerdoodle cookie recipe, try the pie version for another sweet variation.

Snickerdoodle Cookies

Printer Friendly Version

For the Cookies:

1 cup shortening

1 1/2 cups sugar

2 eggs

2 3/4 cups flour

2 teaspoons cream of tartar

1 teaspoon soda

1/2 teaspoon salt

Cinnamon Sugar mixture:

2 tablespoons sugar

2 teaspoons cinnamon

Preheat the oven to 400 degrees.

Whisk together the flour, cream of tartar, soda, and salt in a medium bowl and set aside.

Cream together the shortening and sugar. Add the eggs. Stir in the flour mixture, beating on low speed just until flour is blended.

In a small bowl, combine the sugar and cinnamon. Scoop 1 inch balls of dough and roll in the cinnamon-sugar mixture.

Place dough on cookie sheets about 2 inches apart and bake for 8 to 10 minutes.

Let cookies set on baking sheet for 2 to 3 minutes before removing to a cooling rack.

Wednesday, July 28, 2010

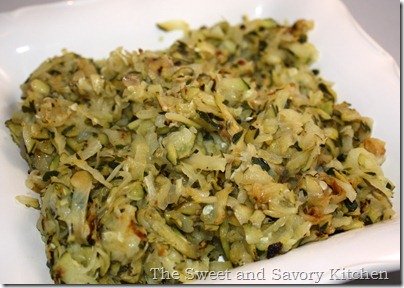
Sautéed Shredded Zucchini

Print

IMG_3960

Last week I shared that I have been trying out some new recipes that incorporate vegetables that we don’t normally eat. Zucchini is yet another vegetable that I haven’t really cooked with before, but I now love! I have actually told my husband that we must plant some next year for our garden. The first time we made zucchini, we tossed slices of it into a cast iron pan with some extra-virgin olive oil, salt, and pepper. That method was good, but then I decided to try this version. The difference in cooking method was shredding the zucchini and adding in some freshly squeezed lemon juice and shallots. Both my husband and I loved this version. So simple, yet light and flavorful! I am looking forward to cooking more with zucchini and hopefully growing it in my own garden too!

Sautéed Shredded Zucchini

Printer Friendly Version

5 medium zucchini (about 8 oz each)

1 1/2 teaspoon salt

2 shallots, finely minced

1 tablespoon olive oil, divided

1 to 2 teaspoons freshly squeezed lemon juice

Freshly ground black pepper

Shred the zucchini with a box grater. Toss the zucchini with the salt in a colander set over a medium bowl; let drain for 5 to 10 minutes. Wrap the shredded zucchini in a kitchen towel, in batches if necessary, and wring out the extra moisture.

Add the zucchini to a medium bowl and toss to break up any clumps. Add the minced shallots and 2 teaspoons of the olive oil and toss to thoroughly combine.

Heat the remaining 1 teaspoon of olive oil in a 12-inch skillet over high heat. Add the zucchini mixture to the pan and distribute in an even layer. Cook without stirring until the bottom layer browns, about 2 minutes. Stir well, breaking up the clumps, and cook once more until the “new” bottom layer browns, about 2 minutes more. Off the heat, stir in the lemon juice and season with salt and pepper to taste. Serve immediately.

Source: Annie’s Eats, originally from Cook’s Illustrated

Tuesday, July 27, 2010

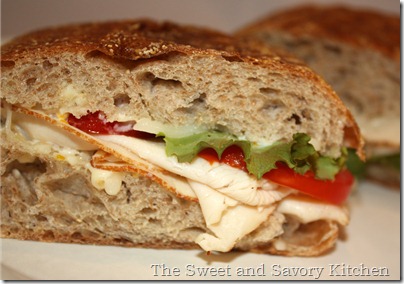
Citrus Chicken Panini

Print

IMG_3924 

This is one of my absolute favorite sandwiches…and it is so easy to make. So, what makes this sandwich so special? The zest of an orange and lemon is added in with my favorite sandwich condiment, mayonnaise! The concept of adding zest, garlic or ginger is something I have used before in burgers or anything that I want to increase the flavor. I also love ciabatta bread. Our grocery store has started carrying whole wheat ciabatta which I was really excited about. If you hate mayonnaise, try substituting for a different condiment. If you prefer a cold sandwich, skip the Panini grill. Hot or Cold, this sandwich is so light and refreshing!

Citrus Chicken Panini

Printer Friendly Version

1/2 cup mayonnaise

1 clove garlic, minced

1 teaspoon lemon zest

1 teaspoon orange zest

Ciabatta loaf, halved lengthwise

6 slices mozzarella cheese

1/2 pound thinly sliced deli chicken breast

2 cups arugula

1 tomato, thinly sliced

1 tablespoon olive oil

Preheat Panini grill.

In a small bowl, combine mayonnaise, garlic, and zests. Spread mixture evenly over cut sides of bread. Layer cheese, chicken, arugula, and tomato evenly over bottom half of bread. Cover with op half of bread.

Brush grill with olive oil. Grill sandwich for 5 to 10 minutes, or until cheese is melted and sandwich is heated through. Cut into slices to serve. Garnish with arugula, if desired.

Source: Cooking with Paula Deen, May/June 2009

Monday, July 26, 2010

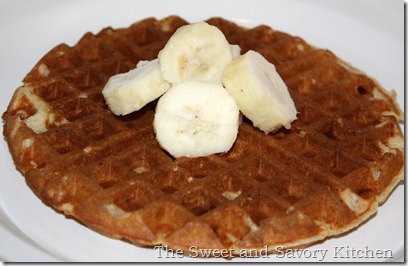
Banana Bread Waffles

Print

IMG_3903 

I finally tried making yeasted waffles over the past weekend and it was a success! My husband’s family tradition growing up was homemade waffles every Saturday morning. It is pretty hard to top the flavor of his mother’s waffles, but I wanted to try a different method and also add in some different flavors. The batter is made the night before so that the yeast has time to rise, which was actually really nice. Saturday morning was almost effortless. The taste of the waffles had a lot of banana flavor with hints of cinnamon and nutmeg, which makes it taste like banana bread! I’m not sure if this is an Oklahoma thing, but I have always put peanut butter on waffles and/or pancakes. My husband thinks I’m crazy, but I love it. The only thing better than a waffle with peanut butter is adding bananas to the mix! Since I was only cooking for two, I cooked all the batter and let the waffles we weren’t eating come to room temperature. You can then wrap the waffles individually in saran wrap and store in a freezer-safe bag for later use.

Banana Bread Waffles

Printer Friendly Version

4 tablespoons unsalted butter, melted

1 cup plus 2 tablespoons warm milk

1 teaspoon vanilla extract

2 cups all purpose flour

1 tablespoon brown sugar

1 1/2 teaspoon yeast

1/2 teaspoon salt

1/2 teaspoon ground cinnamon

1/4 teaspoon ground nutmeg

Dash of ground ginger

Dash of ground clove

2 eggs, lightly beaten

1 cup mashed ripe bananas (about 3 whole bananas)

2 tablespoon sour cream (or Greek yogurt)

In a small bowl, whisk together the melted butter, warm milk, and vanilla extract. Set aside.

In a large mixing bowl, combine the flour, brown sugar, yeast, salt, and spices. Whisk together to blend. Add the wet ingredients to the bowl and whisk just until smooth. Whisk in the eggs until incorporated. Cover the bowl with plastic wrap and refrigerate for at least 12 hours, and up to 24 hours.

When are you ready to make the waffles, remove the batter from the refrigerator and let sit at room temperature for 30 minutes. It should be about double in size and there should be small bubbles on the surface.

Add the mashed bananas and sour cream (or yogurt) to the batter. Whisk lightly to incorporate into the batter. Cook in a preheated waffle maker according to manufacturer's instructions. Serve as desired with maple syrup and banana slices.

Source: Annie’s Eats, originally from Seven Spoons

Friday, July 23, 2010

Red Velvet Cake Balls

Print

IMG_3791

Last month we celebrated my younger brother-in-law’s high school graduation. For several months Curt has asked me to make some red velvet cake balls and I kept telling him I would make them for his graduation. As you can see, he remembered my promise and although I had planned to make the cake balls look like graduation caps, I delivered on my promise. This dessert is dangerous! They are small enough you can just pop in your mouth and not realize how many you just consumed! Bakerella has made cake balls and pops famous. There are so many combinations of cake and icing, chocolate, and fun ways to decorate! They are super easy to make, but they are made in steps, so you need adequate time to prepare. I guess I have another four years to gather the things I need to make graduation caps for Curt’s college graduation!

Red Velvet Cake Balls

Printer Friendly Version

1 box red velvet cake mix (cooked and cooled in a 9 x 13 pan)

1 can cream cheese frosting

1 package chocolate bark (semi-sweet, dark chocolate, or white chocolate)

wax paper

Bake cake as directed. After cake has cooled completely, crumble into a large bowl. Mix thoroughly with 3/4 to 1 whole can of cream cheese frosting. I like to use a fork to combine the frosting and cake crumbs. Using a cookie scoop, roll mixture into quarter size balls and lay on cookie sheet. Chill balls in refrigerator for several hours.

Melt chocolate, a few pieces at a time, in microwave per package directions. Roll balls in chocolate and lay on wax paper until firm. (Use a spoon to dip and roll in chocolate and then tap off extra.)

Source: Bakerella

Thursday, July 22, 2010

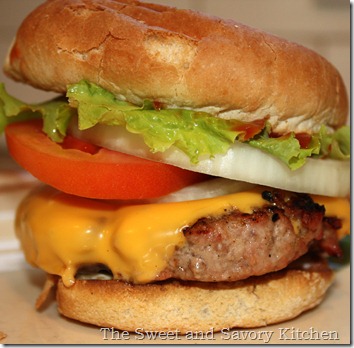
The “Original” Burger

Print

IMG_3852

Today’s post is less about a recipe and more about a method for cooking burgers. I have shared some really great burgers that my family loves, but sometimes you just want the original burger. Everyone has their way of cooking burgers, so today I wanted to share mine. I prefer to use a mixture of ground pork and ground beef, rather than an all beef burger. When I’m at home and my dad is on the grill, I expect to get an all beef burger with some BBQ sauce on top, which by the way is excellent! When I’m at my in-laws, I expect to get an all beef burger with some steak seasoning and Worcestershire sauce. For me, I like to make my patties on my own and sprinkle some Season All seasoning on both sides of the patty about 4 to 6 hours before I actually grill the burgers. About 30 minutes before grilling, I like to take the patties out of the refrigerator to take the chill out of the meat, and splash each patty with some Worcestershire sauce. A burger should always be made to your liking. There is no right or wrong way to grill up a classic, but hopefully I’ve given you a few ideas for your next burger!

The “Original” Burger

Printer Friendly Version

1 lb 1/2 ground beef, 1/2 ground pork combo

Season All seasoning

Worcestershire sauce

4 hamburger buns

Tomato, sliced

Lettuce

Onion, sliced

Cheddar cheese, sliced

Combine the beef and pork mixture and form into 4 patties. Sprinkle the Season All seasoning on each side of the patties. Place in the refrigerator until ready to grill. About 30 minutes before grilling, take patties out of refrigerator and set at room temperature. Splash some Worcestershire sauce on each of the patties.

Preheat grill to medium-high heat. While grill is pre-heating, place hamburger buns on grill and toast. Set buns aside and grill patties until desired doneness.

Place desired toppings on burger and dress with your favorite condiments!

Wednesday, July 21, 2010

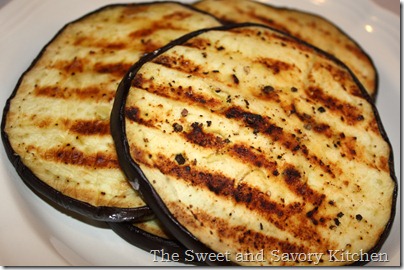
Grilled Eggplant

Print

IMG_3948 

I’m not ashamed to admit that I am trying to incorporate more vegetables into my families diet. However, I am a little embarrassed to say that last week was my first time eating eggplant. It is so bad, but I actually get excited when vegetables taste good without drowning them in cheese or some other sauce. Eggplant, in one week, has become one of my favorite vegetables! The method for grilling eggplant is simple, but planning is key. The eggplant sits in a salt brine for about 30 minutes before placing on the grill, so make sure that is your first step when starting to cook. Since I was only cooking for two, I used half an eggplant one night and saved the other half for the next night. We enjoyed this so much, I purchased another eggplant at the store to make again this week. I am looking forward to trying new recipes with eggplant as well!

Grilled Eggplant

Printer Friendly Version

1 medium eggplant

Kosher Salt

Freshly ground black pepper

Extra virgin olive oil

Garlic Powder

Slice the top and bottom portion of eggplant. Slice eggplant into 1/4 inch thick slices. Place a layer of paper towels down on a cutting board. Lay eggplant sliced on paper towel, generously salt both sides of the eggplant. Cover with more paper towels and place another cutting board or cookie sheet on top. Place something heavy (book, cans, etc.) on top to weigh down. Let eggplant sit for 30 minutes, then rinse eggplant slices and dry off.

Brush both sides with olive oil and season with salt, pepper, and garlic powder. Lay slices on heated grill for about 10 minutes per side. Serve immediately.

Source: Proceed with Caution, originally from Bon Appétit

Monday, July 19, 2010

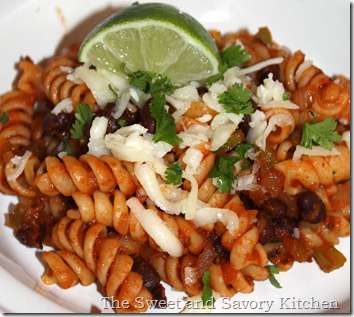
Southwestern Black Bean Pasta

Print

 IMG_3897

My husband and I have been trying to incorporate at least one meatless entree into our dinners each week. We are not becoming vegetarians by any means, but we both have made a commitment to lower our meat intake. This dish is so good, you won’t even notice the meat missing! The cumin adds a smoky flavor while the other elements help bring in the Mexican, Southwest flavor. Another plus with this meal is it’s super budget friendly! Many of the ingredients are pantry staples or produce that is probably already in your kitchen. With minimal effort, you can have a healthy and filling pasta dinner on your table in under 30 minutes!

Southwestern Black Bean Pasta

Printer Friendly Version

15 oz can black beans, rinsed and drained

15 oz can tomato sauce

1 tablespoon olive oil

1 green pepper, chopped

1 medium onion, chopped

2 cloves garlic, minced

1 3/4 teaspoon cumin

2 teaspoons oregano

1/2 teaspoon salt, plus more to taste if desired

1/4 teaspoon black pepper

Lime wedges, for garnish

Monterey Jack cheese, for garnish

Cilantro, for taste and garnish

1/2 pound pasta

Heat the olive oil over medium high heat in a large sauté pan. Add the onion and sauté for 5 minutes, until tender. Add the chopped bell peppers and sauté for an additional 2 to 3 minutes. Add the garlic and spices and sauté one more minute. Stir in the beans and tomato sauce.

Let the sauce simmer over low heat while you prepare the pasta, about 20 minutes. Stir the prepared pasta into the sauce. Taste for flavor and add additional salt if you’d like. Serve topped with a lime wedge for squeezing, Monterey jack cheese, and chopped cilantro.

Source: GoodLife {eats}

Friday, July 16, 2010

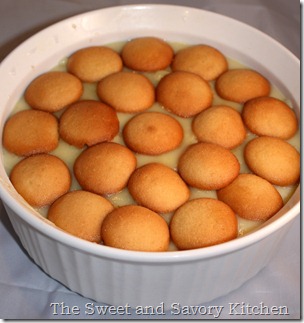
Banana Pudding

Print

IMG_3886

This is a very special recipe from my Granny…she knows how to make a mean banana pudding! I have been craving this pudding for many weeks, perhaps because I was looking for a little taste of home. My Papa loved banana pudding. He had many diet restrictions due to his health, but banana pudding was one of his favorite desserts. My Granny would make for him using splenda in place of sugar so that he could enjoy something sweet. I can’t help but think of him when I make it. This is also one of the first desserts I made after we moved to New York for a party with some friends. Turns out no one knew what banana pudding was. I get that my family is Southern, but seriously…it’s banana pudding? This is the perfect summer treat to help take the heat out of the day and one of my childhood favorites.

On another note…I had a birthday this week! I thought about making my own birthday cake, but for now I’ve decided to wait until the end of the month so we can celebrate the other 2 July birthdays in the fam. Not to worry though, the husband made sure I got some sweet treats in the form of red velvet and tiramisu cheesecake!

Banana Pudding

Printer Friendly Version

1 1/4 cup sugar

3 tablespoons flour

3 eggs, lightly beaten

3 cups milk

2 teaspoons vanilla

4 to 5 ripe bananas, sliced

1 box vanilla wafers

Combine sugar, flour, and eggs in a medium saucepan. Add in milk and stir to combine. Cook mixture on medium heat, stirring constantly until thick, but not as thick as pudding.

Once mixture is thick, remove from heat and add vanilla, stirring to combine.

Using a 2 1/2 quart dish, place a single layer of vanilla wafers in the bottom of dish. Place a layer of bananas over wafers, followed by another layer of wafers. Place half of pudding mixture over wafers. Continue with another layer of wafers, bananas, pudding, and top with wafers.

Chill for at least 4 hours. Serve cold.

Thursday, July 15, 2010

Chicken Caesar Salad Pasta

Print

IMG_3811

You might remember me telling you about one of my favorite, simple pasta dishes – Pasta Toss. This dish is a play off pasta toss, but also happens to mimic another favorite, chicken Caesar salad. The pasta can be served either hot or cold. With the heat of the summer in full swing, I opted to serve the pasta cold. All the flavors of a Caesar salad were present.  I also decided to use store bought Caesar dressing. I am quite sure a homemade version would be better, but I was more interested in convenience. I cooked the chicken using my indoor grill pan. Other options would be using a rotisserie chicken from the store. Either way, this meal is a great spin on Caesar salad!

Chicken Caesar Salad Pasta

Printer Friendly Version

1 1b pasta (bow tie or spiral), cooked, served warm or cold

2 cups chicken, cooked and sliced

2 Roma tomatoes, diced and seeded

1 clove garlic, minced

1/4 cup green onions, chopped

2/3 Parmesan, shredded

1/4 cup fresh basil, thinly sliced

1/2 cup croutons

1/2 teaspoon salt

1/2 teaspoon freshly grated black pepper

1/2 cup Caesar salad dressing

Gently toss all ingredients together and serve immediately.

Source adapted from: Natalie’s Killer Cuisine

Tuesday, July 13, 2010

Ginger Peanut Chicken Salad Wrap

Print

IMG_3831

I was really excited to try a few new recipes with the homemade flour tortillas I shared with you yesterday. In the summer months, I’m all about make-ahead, super fast dinners that allow me to spend time out side of the kitchen. This was a refreshing wrap that married some of my favorite flavors. It is no secret that I love my peanut butter, so I was very happy to see a recipe that incorporated both peanut sauce and ginger. Like most chicken salads, it was the perfect meal for a hot summer day. On another note, some of the ingredients used came straight from our garden. That’s right, we started a garden! Some day I will take pictures to share, but it has been fun watching everything start from a seed and grow. I have loved going out each day and picking fresh lettuce and tomatoes for our dinners!

Ginger Peanut Chicken Salad Wrap

Printer Friendly Version

1 teaspoon olive oil

6 (4 oz) boneless, skinless chicken breast halves

1 cup chopped seeded peeled cucumber

3/4 cup chopped red bell pepper

1 1/2 tablespoons sugar

1 tablespoon ginger, peeled and minced

3 tablespoons fresh lime juice

1 tablespoon soy sauce

1/4 teaspoon salt

1/4 teaspoon ground red pepper

1 clove garlic, minced

1/4 cup creamy peanut butter

2 tablespoons water

3 tablespoons fresh cilantro, chopped

8 (8 inch) flour tortillas

4 cups lettuce, chopped

Heat oil in a large nonstick skillet over medium-high heat. Add chicken; cook 5 minutes on each side or until done. Remove the chicken from pan and cool. Shred the chicken into bite-size pieces. Place chicken, cucumber, and bell pepper in a large bowl; set aside.

Place sugar, ginger, lime juice, salt, soy sauce, red pepper, and garlic in a blender, process until smooth. Add peanut butter and water, process until smooth, scraping sides. Add peanut butter mixture to chicken mixture; stir well. Add cilantro, and toss well. Warm tortillas according to package directions. Spoon 1/2 cup chicken mixture onto each tortilla; top each serving with 1/2 cup lettuce and roll up.

Source adapted from: www.myrecipes.com

Monday, July 12, 2010

Homemade Flour Tortillas

Print


IMG_3823 

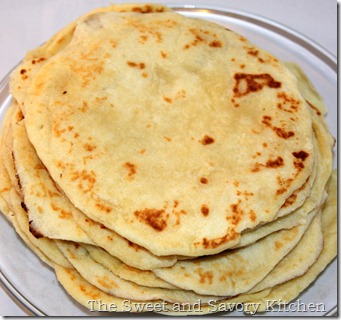
Every now and then I am surprised by how easy things are to make. I love fresh flour tortillas. They are my favorite part of dinner when I sit down for Mexican food. I could make a meal out of just the salsa, queso and tortillas. Many of the restaurants back home had a little window were guest could see tortillas being made. After seeing a recipe on how they were made, I knew I had to try them. Of course you can buy tortillas at the store, but honestly I’m sick of them. After having fresh tortillas, store-bought seem like dry, paper tortillas; they are convenient, but if you are a planner like myself you can make homemade tortillas the day before you plan to eat them. After making them myself, I will have a hard time buying them in the store. I have officially been converted!

Homemade Flour Tortillas

Printer Friendly Version

2 1/2 cup all-purpose flour

2 1/2 teaspoons baking powder

1 teaspoon kosher salt

1/2 cups lard or vegetable shortening

2 tablespoons (additional) Lard or vegetable shortening

1 cup hot water

Combine flour, baking powder, and salt in a large wooden bowl. Stir together.

Add spoonfuls of lard or shortening (use 1/2 cup plus 2 tablespoons), then use a pastry cutter (or fork) to combine the ingredients. Cut mixture until it resembles coarse crumbs.

Slowly pour in hot water, stirring to bring mixture together. Lightly knead dough 30 to 40 times, or until it becomes a cohesive ball of dough and is less sticky. Cover with a tea towel and allow dough to rest for at least an hour.

Roll into 16 ping pong size balls, place on a try, cover with a tea towel, and allow to rest for another 20 to 30 minutes.

When you’re ready to make the tortillas, heat a dark or cast iron skillet to medium/medium-high heat. One by one, roll out balls of dough until very, very thin. Throw tortillas (one by one) onto the griddle. Cook on each side for 20 to 30 seconds, removing while tortillas are still soft by slightly brown in spots. Remove and stack tortillas, and cover with a towel to keep warm. Serve immediately or allow to cool before storing tortillas in a container. To warm, nuke tortillas in the microwave, or wrap in foil and warm in the oven.

Source: Pioneer Woman

Friday, July 9, 2010

Chocolate Chip Cookies

Print

IMG_3743

Chocolate chip cookies are nothing new. Everyone has the own version and preference when it comes to a chocolate chip cookie. I will admit, growing up I didn’t really have much attachment to chocolate chip cookies. There were so many other cookies I preferred. When I did crave them, I loved the Pillsbury version better than the any homemade version. What was I thinking? I happened to marry a man that is highly addicted to chocolate chip cookies and must have them as often as possible. I have tried several variations to the recipe, but my favorite so far comes from the lovely Dorie Greenspan. When cooked perfectly, the cookies have a crispy, but not overly done outside and a gooey, soft center. If I’m just making a batch for two, I like to make the whole recipe and then individually freeze the rounded dough by placing on a lined sheet pan and allowing to freeze individually before placing in a freezer-safe bag. The dough can be taken straight from the freezer to the oven, with an increased baking time of one to two minutes.


Chocolate Chip Cookies

Printer Friendly Version

2 cups all purpose flour

1 teaspoon salt

3/4 teaspoon baking soda

2 sticks unsalted butter, room temperature

1 cup sugar

2/3 cup light brown sugar, packed

2 teaspoons vanilla extract

2 large eggs

12 oz bittersweet chocolate, chopped or 2 cups store-bought chocolate chips or chunks

1 cup finely chopped walnuts or pecans, optional

Preheat the oven to 375 degrees. Line two baking sheets with parchment or silicone mats.

Whisk together the flour, salt, and baking soda.

Working with a stand mixer, fitted with a paddle attachment, or with a hand mixer in a large bowl, beat the butter on medium speed for about 1 minute, or until smooth. Add the sugars and beat for another 2 minutes or so, until well blended. Beat in the vanilla. Add the eggs one at a time, beating for 1 minute after each egg goes in. Reduce the mixer speed to low and add the dry ingredients in three portions, mixing only until each addition is incorporated. On low speed, or by hand with a rubber spatula, mix in chocolate and nuts.

Spoon the dough by slightly rounded tablespoonfuls onto the baking sheets, leaving about 2 inches between spoonfuls.

Bake the cookies, one sheet at a time and rotating the sheet at the midway point – for 10 to 12 minutes, or until they are brown at the edges and golden in the center; they may still be a little soft in the middle, and that’s just fine! Pull the sheet from the oven and allow the cookies to rest for 1 minute, then carefully using a wide metal spatula, transfer them to racks to cool to room temperature.

Repeat with the remainder of dough, cooling the baking sheets between batches.

Source: Baking from My Home to Yours by Dorie Greenspan

Thursday, July 8, 2010

Watermelon – Strawberry Slushy

Print

IMG_3858

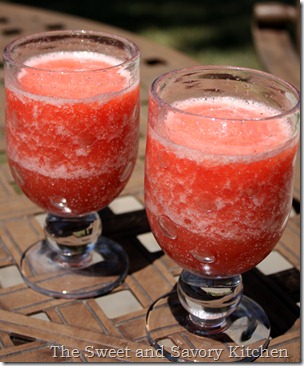
This past weekend was a very relaxing one for me and my husband. We decided to pick up a watermelon at the grocery store to munch on throughout the week. I am always amazed by how much watermelon my dear hubby can eat in one sitting! After cutting up half of the watermelon and taking a sample, I discovered that we had purchased an over-ripe watermelon. For those that don’t quite know, over-ripe watermelons have a mealy/grainy texture. While the flavor is still really sweet, I can’t handle the texture. I probably should have taken the watermelon back, but since I had already cut half of it up I did a little research and found a refreshingly sweet slushy! The temperatures in New York are quite warm for this area. I am starting to feel like I’m back at home for a summer in Oklahoma!! Needless to say, this slushy really hit the spot, providing us with an icy cold, refreshing beverage.  If case you have some leftover watermelon from the weekend, try this drink…you won’t be sorry!!

Watermelon – Strawberry Slushy

Printer Friendly Version

1 cup fresh strawberries, hulled

1 1/2 cups watermelon, cubed and seeded

3 tablespoons honey (use sugar as a substitute if needed)

3 tablespoons fresh lime juice (use lemon if needed)

1 cup ice cubes

Place all ingredients in a blender and process until smooth. Serve immediately.

Source adapted from: www.nytimes.com

Wednesday, July 7, 2010

Egg Salad Sandwiches

Print

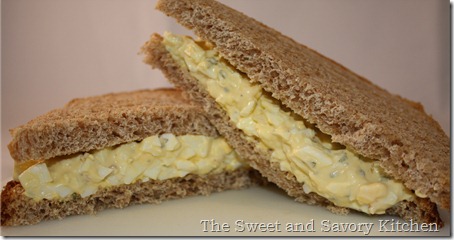
IMG_3700The classic cold salad sandwiches: egg, chicken, tuna and ham. I generally always go straight for chicken salad. I’m not even sure I had egg salad in my younger years, but lately I’ve been  craving it. My favorite chicken salad recipe calls for tarragon, so when I was searching for an egg salad recipe, I knew I had found a good one when it called for tarragon as one of the main ingredients. The shallots provide a sharp onion flavor, rounding out the flavors of a good egg salad. If you want to prepare the salad ahead of time, I would combine all ingredients except for the eggs. Add the eggs at the last minute, this will ensure that the salad stays nice and fresh.

Egg Salad

Printer Friendly Version

8 large eggs

1/2 cup mayonnaise

3 tablespoons shallot, finely chopped

1 1/2 tablespoons fresh tarragon, finely chopped

2 teaspoons white-wine vinegar

1/4 teaspoons salt

1/4 teaspoons black pepper

Cover eggs with cold water by 1 inch in a 2-quart heavy saucepan and bring to a rolling boil, partially covered. Reduce heat to low and cook eggs, covered completely, 30 seconds. Remove pan from heat and let eggs stand in hot water, cover, 15 minutes. Transfer eggs with a slotted spoon to a bowl of ice cold water and let stand 5 minutes (to cool). Peel eggs and finely chop.

Stir together eggs and remaining ingredients in a bowl with a fork.

Serve on your favorite sandwich bread.

Source: www.epicurious.com

Monday, July 5, 2010

Orange-Ginger Grilled Chicken Thighs

Print

IMG_3465

I hope everyone had a fun, relaxing and safe holiday weekend!

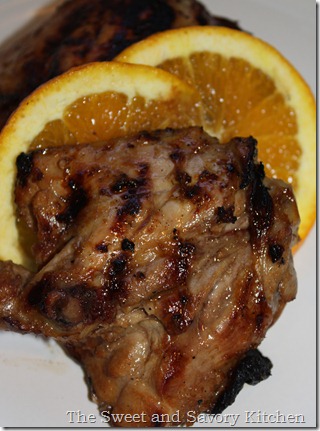
It should be no secret by now that I’m a fan of ginger. I am always looking for recipes that call for ginger as one of the main components of the dish. Generally, chicken breast are my go-to cut of chicken, but chicken thighs are a welcome change from the norm. Bone-in chicken thighs can add tons of moisture and flavor if cooked correctly.  Next time around I think I will add in the zest of the orange as well.  All the flavors were there, but the orange was a little muted. This is another meal that is light and fresh, allowing you to stay out of the kitchen, enjoy the outdoors and let your grill do all the work!

Orange-Ginger Grilled Chicken Thighs

Printer Friendly Version

1/3 cup fresh orange juice

3 tablespoons rice wine vinegar

3 tablespoons soy sauce

1 tablespoon garlic, minced

1 tablespoon ginger, minced

1 tablespoon sesame oil

8 chicken thighs, bone in and skin on

Garnish: fresh cilantro, orange slices (if desired)

Combine orange juice, vinegar, soy sauce, garlic, ginger, and sesame oil in a shallow dish or large zip-top bag; add chicken. Cover or seal and chill at least 1 hour, turning occasionally.

Remove chicken thighs from marinade and discard marinade.

Grill, covered, over medium-high heat 4 minutes on each side or until done. Garnish, if desired with cilantro and orange slices.

Source: www.myrecipes.com

Friday, July 2, 2010

Coffee Heath Bar Crunch

Print

IMG_3799

Happy 4th of July!! I am very excited for a three day weekend, things have been super stressful lately. This weekends activities will consist of lots of grilling. Lots of hamburgers, hot dogs, and homemade pies...but for me it is also about the homemade ice cream. My parents have been making homemade ice cream for years. For the longest time, my dad used the old crank style ice cream machine...that is dedication!! I can remember the first summer we moved to New York I had one (of many) meltdowns, this one was over homemade ice cream. In Oklahoma, rock salt is a year-round item that you can find in any grocery store...in New York rock salt is a seasonal item that is only available during the winter months, specifically for snow. This is where the meltdown comes in. I called my mom in tears, I threatened my husband that I was packing up and moving back home, I hated this new place - I wanted the comfort of homemade ice cream. Fast forward to four years later, I made adjustments, I'm at peace with not having rock salt, and we have homemade ice cream once again! This is by far my favorite homemade ice cream flavor. The name describes everything about the ice cream: Coffee...heath bar...pure crunchy goodness! It is creamy and down right delicious!

I hope you each of a happy and safe 4th of July weekend!

Coffee Heath Bar Crunch

Printer Friendly Version

1 package of individually wrapped mini Heath Bars (or 6 to 8 Heath Bars)

1 1/2 cups sugar

4 large eggs

4 cups heavy or whipping cream

2 cups milk

6 tablespoons instant espresso

Using a sharp knife, cut the candy bars into 1/2 to 1 inch chunks. You should have about 2 cups. Place in a bowl, cover and freeze.

Whisk the eggs in a mixing bowl until light and fluffy, 1 to 2 minutes. Whisk in the sugar, a little at a time, then continue whisking until completely blended, about 1 minute more. Add the cream, milk, and 4 tablespoons of espresso powder and whisk just until blended.

Transfer the mixture to an ice cream maker and freeze following the manufacturer’s instructions.

After the ice cream stiffens (about 2 minutes before it is done), add the candy and the remaining 2 tablespoons espresso powder, then continue freezing until the ice cream is ready.

Yields a generous 2 quarts.

Source adapted from: Ben and Jerry’s Homemade Ice Cream and Dessert Book

Thursday, July 1, 2010

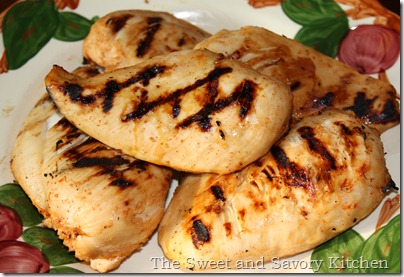
Tequila Lime Chicken

Print

IMG_3697

I posted the chicken tequila burgers last month, so today I wanted to share the original dish with you, tequila lime chicken. The marinade packs a ton of flavor into the chicken. Limes are the key ingredient and the main flavor component…and the tequila only helps!  The chicken is delicious on its own, but after serving it to my family the main comment was how good it would be in fajitas and I couldn't agree more. Fix the chicken for fajitas, tacos, burritos...any dish that needs Mexican inspired flavor. The original recipe calls for the chicken to be placed in the marinade overnight, but I didn't put everything together until the morning of, which was still plenty of time for the marinade to work its magic!

Tequila Lime Chicken

Printer Friendly Version

1/2 cup tequila

1 cup freshly squeezed lime juice (from 5 to 6 limes)

1/2 cup freshly squeezed orange juice (from 2 oranges)

1 tablespoon chili powder

1 jalapeno pepper, minced and seeded

1 tablespoon garlic, minced

2 teaspoons kosher salt

1 teaspoon freshly ground black pepper

1 tablespoon cilantro, chopped (optional)

6 boneless chicken breasts, skin on (I used skinless)

Combine the tequila, lime juice, orange juice, chili powder, jalapeno pepper, garlic, salt, pepper, and cilantro in a large bowl. Add the chicken breasts. Refrigerate overnight.

Heat a grill with coals and brush the rack with oil to prevent the chicken from sticking. Remove the chicken breasts from the marinade, sprinkle well with salt and pepper, and grill (skin-side down) for about 5 minutes, until nicely browned. Turn the chicken and cook for another 10 minutes, until just cooked through. Remove from the grill to a plate. Cover tightly and allow to rest for 5 minutes. Serve hot or at room temperature.

Source adapted from: Barefoot Contessa Family Style